Pages

Sunday, November 21, 2010

Cupcake obsession

Lately I've made a lot of cupcakes. I guess you could call me cupcake obsessed. I've been playing around with some new flavors. Here is the latest one I've done:

Maple Cupcakes
Makes 1 dozen cupcakes

1 1/2 cups flour
1 tsp baking powder
1/4 tsp salt
1/2 cup butter, softened
2/3 cup brown sugar
2 eggs
1 tsp vanilla
1/3 cup buttermilk
1/3 cup maple syrup (Use real maple syrup. Grade B is best because it has the most intense flavor)

1. Cream the butter and brown sugar together.
2. In a separate bowl, sift the dry ingredients together.
3. Add the eggs and vanilla to the creamed mixture and beat to combine. Scrape down the bowl once combined.
4. Add the dry ingredients and mix until just combined.
5. Add the buttermilk and maple syrup.
6. Fill cupcake cups 2/3 full and bake at 350 degrees for 15-18 minutes, or until a toothpick inserted in the center comes out clean.


Saturday, November 20, 2010

Oh my heavenly cheese.

What I made for dinner tonight involved four different cheeses. FOUR! I'm lactose intolerant. Basically, this was a death wish. But it was a death I welcomed with open arms. For the cheesy goodness that I inhaled off my plate tonight was....Manicotti.

But not just any old Manicotti. Oh no. This was special Swiss Chard and Sweet Pea Manicotti. I totally stole the idea from Giada de Laurentiis (Love her!). Because this Manicotti had peas and Swiss Chard (TWO green vegetables) I decided it made up for it being covered in cheese...right? Anyway, remember this dish next time you are trying to sneak green food into your children. It's covered in cheese, so they have to love it. Who can resist anything when it's drenched in cheese?

Swiss Chard and Sweet Pea Manicotti

12 manicoti or canneloni pasta shells

FILLING
1 bunch red or white Swiss chard
2 TBS olive oil
1 medium onion, diced
1 garlic clove, minced
1 (15 oz) container ricotta cheese
3/4 cup frozen peas, thawed
1 cup shredded mozzarella cheese
3/4 cup grated Parmesan cheese
1/4 cup fresh basil
Salt and pepper to taste

FONTINA FONDUTA SAUCE
3/4 cup milk
1/2 cup heavy cream
3 cups grated fontina cheese
2 TBS grated Parmesan cheese
2 TBS fresh chopped basil

1 1/2 cups shredded mozzarella cheese

1. Preheat the oven to 400 degrees. Grease a 9x13 inch glass baking dish
2. Bring a large pot of salted water to boil. Add the pasta and cook until tender, but still firm to the bite, about 6-8 minutes. Drain the pasta. Set aside
FOR THE FILLING
3. Remove the Swiss chard stems. Chop the leaves into 1 inch pieces.
4. In a large skillet, heat the olive oil over medium-high heat. Add the onion and cook until soft. Add the garlic and cook until fragrant. Then add the chard and cook until wilted, about 2 minutes. Cool the mixture slightly.
5. Place the ricotta, peas, mozzarella, parmesan, basil, salt, and pepper in the bowl of a food processor. Add the cooled chard mixture and blend until smooth.
6. Spoon the mixture into a prepared pastry bag with a large tip and stuff each manicotti shell with the filling. Place the stuffed manicotti in the prepared baking dish.
FOR THE SAUCE
7. In a medium saucepan, bring the milk and cream to a simmer.
8. Reduce the heat and add the fontina, stirring constantly until the cheese is melted and the mixture is smooth.
9. Remove the pan from heat and stir in the Parmesan cheese and basil.
10. Pour the sauce over the stuffed pasta and sprinkle with the remaining mozzarella cheese. Bake for 30-35 minutes until the top is golden. Let the baked manicotti stand for 5 minutes before serving.


I'll make you banana pancakes, pretend like it's the weekend...

Pancakes. This word alone has the power to draw sleepy roommates from their beds, calm the rage of a hungry five year old, and to bring back memories of late night runs to IHOP or family breakfasts in which mom would make pancakes shaped like Mickey Mouse.

I made pancakes this morning. Not banana pancakes as my title may suggest....I mostly just used that fabulous little number by Jack Johnson because I enjoy having catchy titles. I'll post about banana pancakes another time. By then maybe I will have thought of another clever pancake title.

Today, whole wheat pancakes. A lot of people don't like whole wheat pancakes because they tend to be reeeeeeeeeeally dense and quite chewy. Not these pancakes. Guaranteed, these will be the lightest, fluffiest whole wheat pancakes you've ever had the pleasure of sinking your teeth into. But be warned, they are quite filling. I eat like a pig and I get stuffed with 1 1/2 pancakes.

Whole Wheat Pancakes

1 1/2 cups whole wheat flour
1/4 cup sugar
1 tsp baking soda
1/2 tsp salt
1/2 tsp cinnamon
2 eggs
2 cups vanilla soymilk (If you don't know, I'm lactose intolerant. If you aren't, by all means use regular milk!)
1 tsp vanilla
1 1/2 TBS vegetable oil

1. Sift all of the dry ingredients into a medium sized bowl
2. Separate the egg yolks and whites. Put the yolks in the bowl with the dry ingredients, and put the whites in a separate bowl.
3. Whip the egg whites until medium peaks form.
4. Add the milk, oil, and vanilla to the dry ingredients and mix gently to combine.
5. Gently fold the egg whites into the batter


PANCAKE SECRET! The secret to getting perfectly round pancakes is to use a ladle to drop your batter into the pan. When you start to tip the ladle to let the batter run out, DO NOT MOVE IT FROM ITS POSITION. This will result in perfect pancakes. :)

Tuesday, November 16, 2010

Not your average chicken noodle soup

Okay so I woke up feeling like an absolute mess this morning. Runny nose, scratchy throat, head full of fog...joyous. After skipping class and going back to bed for a few more hours I felt a little better. I decided that for dinner tonight, nothing would be better than my home made chicken soup. It's delicious, comforting, and the spices I use clear my sinuses like you wouldn't believe.

Jana's Chicken Noodle Soup

2 boneless, skinless chicken breasts, medium dice
1 medium onion, medium dice
3 celery stalks, diced
2 large carrots, diced
1 1/2 quarts chicken stock/broth (See my post on how to make your own if you want!)
1 1/2 cups dry pasta (whatever shape you want! I used shells tonight)
1 cup frozen peas
3/4 cup frozen corn kernels
3 tsp curry powder
2 tsp dried tarragon
1 tsp dried thyme
Salt and pepper to taste
1-2 TBS fresh chopped parsley

1. Bring liberally salted water to a boil in a medium sized pot. Add the pasta and stir occasionally, removing from the water and setting aside when still slightly underdone.
2. While the pasta is cooking, heat a small amount of olive oil in a large pot. Add the chicken and sear on all sides, not cooking all the way done. Remove from the pot and set aside.
3. Add the onions to the pot and cook until just beginning to turn translucent. Add the carrots and celery, sauteeing until slightly tender.
4. Add the chicken stock and spices and bring to a low boil.
5. Return the chicken to the pot and add the pasta, peas, and corn. Continue on a low boil until the chicken is cooked through and the pasta is al dente.
6. Serve garnished with fresh chopped parsely.

Enjoy!


For my friends of the gluten free persuasion

I have had a couple requests of late to post some gluten free recipes. This seemed like a good idea to me, seeing as I know a couple people who have Celiac's disease, some who are just slightly sensitive to gluten, and then there are those who just want to be trendy and not eat gluten. Whatever boat you may be in, I did some experimentation, some research and here is the kick butt gluten free bread recipe I ended up with: OH! P.S. You can buy all of these ingredients at Sunflower Market. I bought Bob's Red Mill brand because it's excellent. If you don't have a Sunflower in your area, first of all, WEEP! But you can find Bob's Red Mill stuff in most grocery stores or health food stores.

Buckwheat Bread
Despite it's name, buckwheat is actually not wheat, contains no gluten, and is safe for celiacs to ingest. :)

1 cup sorghum flour
1 cup potato starch (NOT POTATO FLOUR!)
1/2 cup buckwheat flour
2 tsp xanthan gum
1 1/4 tsp salt
1 packet rapid rise yeast (or 2 1/4 tsp)
1 1/4 cup water
3 TBS olive oil
1 1/2 TBS honey
1/2 tsp lemon juice
1 egg white, whipped

1. In a stand mixer, add the yeast to the water. Add the dry ingredients, mix briefly, then add the remainder of the wet ingredients.
2. Transfer to a greased loaf pan, smooth and cover with a towel. Let rest for 20 minutes.
3. Bake at 350 for 35-40 minutes or until the loaf generates a hollow sound when thumped.

If you like your bread to be more crusty on the outside, you can remove it from the pan at this point and place it straight onto the oven rack for a few minutes.

4. Transfer to a wire rack to cool. Be sure to cool it for at least 10 minutes, or it will be hard to slice evenly.

*NOTE* The dough will actually be of a consistency more like muffin batter rather than an actual wheat based dough. This is due to the fact that is contains no gluten which is what lends dough its elasticity. So don't panic if your bread dough is like batter. It's supposed to be that way.

Let me also stress that each ingredient is absolutely essential and should not be omitted or lessened in any way. You will have poop bread if you try to omit something from this recipe.


Sunday, November 14, 2010

Move over Rachael Ray

Tilapia fillet with cilantro sour cream, sauteed spinach with garlic,
tarragon roasted sweet potatoes, and curried butternut squash puree.

As much as Rachael Ray drives me absolutely bonkers, the concept of 30 minute meals has a lot of appeal for people nowadays. Let's face it, we live in a fast paced world. Most people don't have or don't make time for nutritious, delicious family dinners anymore. Which seriously breaks my heart (See The Purpose of This Blog).

Anyway, I digress. I think the reason a lot of people don't have home cooked meals anymore is because they just don't know how to go about putting good food on the table in short order. What most people need is a little inspiration. Here it is.

Fish. Yes, I recognize some people don't like seafood. However, I must extol the virtues of fish, for it has the ability to go from freezer to table in 15 minutes. No joke. My roommates and I shop at Walmart for most of our groceries (except for produce, in which case we go to Sunflower). There we buy bags of individually vacuum sealed fish fillets. Some weeks we buy salmon, others we buy cod...this week was tilapia. You can get 4-5 filets for about $4.98. Not bad, not bad. So now that we know it's relatively cheap, lets get back to the time factor. Freezer to table in 15 minutes. I wasn't kidding. Is that not the most beautiful thing you've ever heard? All you do is throw the fillets (once out of the plastic of course!) on an oiled sheet pan, sprinkle with salt and pepper (and whatever spices you may care to use), and put them in the oven under the broiler. 10-15 minutes later, they are done. In the meantime, you can whip up some tasty sides, and there you have it! Dinner on the table in 15 minutes. Take that Rachael Ray. You're 30 minute meals just got their butts handed to them!

!!!!!!Tasty Side Ideas!!!!!!!

Curried Butternut Squash Puree

1 butternut squash, peeled and seeded
1 tsp curry powder
1 TBS agave syrup (honey works well too!)
1 TBS butter
salt and pepper to taste

1. In a large pot, bring liberally salted water to a boil
2. Meanwhile, dice the butternut squash into small chunks
3. Once the water is boiling, add the squash and cook until fork tender, about 10 minutes
4. Drain the water from the squash, and return to stove
5. Add the butter, salt, pepper, curry powder, and agave
6. Mash with a potato masher. Or puree in blender or food processor. Or bust out your immersion blender and puree it stovetop. Whatever your little heart desires.

Tarragon Roasted Potatoes
One of my favorite sides. It's my go to side when I'm feeling lazy and I don't want to put in a lot of effort but still want something delicious and good for me.

2 large russet potatoes, well scrubbed, skins on (or red potatoes, or yukon gold potaoes.....you get the point)
1 large sweet potato, peeled (yams are okay as well)
1-2 tablespoons dried tarragon (located in the spice aisle of course!)
Olive oil for drizzling
Salt and pepper

1. Preheat the oven to 425 degrees
2. Dice the potatoes in about half inch cubes.
3. Transfer potatoes to an oiled sheet pan.
4. Drizzle the potatoes with oil, sprinkle with salt, pepper, and tarragon.
5. Roast in the oven until fork tender, about 15-20 minutes

Tuesday, November 2, 2010

The Stock Box OR How I Saved $4


I am about to share with you something that may change your life forever. Well, maybe not. But this little tidbit may help you out if you are trying to put good food on the table while working with a tight budget.

Allow me to introduce you to the stock box:

My stock box is just a tupperware container that lives in my freezer. When I'm making a salad or prepping vegetables, I pull it out and put my vegetable scraps in it. Onion ends, carrot ends, pieces of celery that aren't as crunchy as they used to be, parsley stems, red bell pepper pieces....no one is to poor to be included in my stock box (except potatoes. They make my finished product cloudy!)

I also save the scraps of the meats I process in my kitchen. For me this means the trimmings of a pork tenderloin, the carcass of a chicken I roasted for Sunday dinner, the bones leftover from my chicken drumsticks, you name it. I put those in a gallon size ziploc bag, label it and toss it in the freezer.

Now, when I notice that my stock box is full of vegetable scraps and I have a bag of bones accumulated in my freezer, I pull it out to thaw in the fridge. Once it's thawed, I put it the bones and the contents of my stock box in a large pot, cover it with water, and put it on the stove on low heat and I let it simmer for several hours.


After several hours of simmering on the stove, I strain the liquid into another tupperware container, and what I'm left with is a beautiful, flavorful broth.


Do you see what I just did there? I took something that most people just throw away and I turned it into something usable. Because I just saved my scraps, I don't ever have to go out and buy a can of Swanson broth when I want to make soup. I have homemade, delicious broth right in my fridge. You can freeze it too, if you'd like to save it for another time. But seriously people. I just saved myself about $4 by saving my garbage.

Here's what I'm making tonight for dinner with my delicious chicken broth.

Olive Garden's Zuppa Toscana

1 lb Italian sausage
8 oz smoked bacon, diced
1 quart chicken broth (hey look at that! You don't have to buy it!)
2 large russet potatoes, scrubbed and cubed
2 cloves garlic, crushed
1 medium onion, chopped (HEY! Save the ends for your stock box!)
2 cups chopped kale or Swiss chard
1 cup heavy cream
Salt and pepper

1. In a skillet over medium heat, brown the sausage, breaking into small pieces. Drain and set aside.
2. Fry the bacon until brown, drain and set aside.
3. Combine the broth, potatoes, garlic, and onion in a pot; simmer over medium heat until potatoes are tender, 10-15 minutes
4. Add the sausage; simmer for 10 minutes.
5. Add the kale and dream. Season with salt and pepper to taste and simmer until the soup is heated through. Do not allow to boil.
6. Add bacon just before service so it remains crispy.

*DISCLAIMER* In a restaurant setting, this is not, not, NOT the way you make stock. I fully understand that and I promise I am a lot more conscious of what is going into my stock pot when I am working. However, at home I find that this is a really great money saving tip that yields great results without a ton of extra work.

Sunday, October 31, 2010

The Great Pumpkin


Fall food. Love it. I think I've mentioned that a time or two on this blog...So pumpkins. They're pretty awesome. And they are good for a lot more than just making jack o lanterns. Here are a few things you can try with pumpkin.

Pumpkin Wedges with Sage

Preheat oven to 400. Cut a small pumpkin (such as a sugar pumpkin) in half; scrape out seeds. Drizzle pumpkin with olive oil, season with salt and black pepper. Place cut side down on a baking sheet. Roast for 30 minutes. Remove from oven. Turn oven to broil. Cut pumpkin into 2 inch wedges; poke fresh sage leaves into flesh. Drizzle with more olive oil. Broil until wedges are sizzling and sage is crisp, about 6 minutes. Serve.

Indian Spiced Pumpkin
Roast pumpkin in the oven at 400 degrees for 45 minutes using the above method (you know, cut side down and all that). Scrape out pumpkin flesh. In a skillet over medium heat, warm about a tablespoon of olive oil. Add 1/4 tsp fennel seeds, 1/4 tsp cumin, and 1/4 tsp red pepper flakes. Cook until fragrant, about 1 minute. Add pumpkin and 2 Tbsp maple syrup. Cook for 1 minute, mashing to combine. Add 1 Tbsp unsalted butter and stir. Serve immediately.

Or one of my favorite ways to have pumpkin...

Pumpkin Spice Bread

2 cups pumpkin
3 cups sugar
1 cup water
1 cup oil
4 eggs
3 1/2 cups flour
2 tsp baking soda
2 tsp cinnamon
1/2 tsp nutmeg
3/4 tsp cloves
1 tsp salt
1 tsp baking powder

1. Combine sugar and wet ingredients in a bowl
2. Combine dry ingredients in a separate bowl and add slowly to the wet mixture.
3. Divide between 2 greased loaf pans and bake 60-70 minutes @ 350.
4. Cool on a rack for 10-15 minutes, then remove from pan to finish cooling.

This time around, I made my pumpkin spice bread into pumpkin spice cupcakes. It makes 34-36 cupcakes depending on how full you fill your cupcake cups. If you want to make cupcakes, they only take 20-25 minutes to bake. I topped mine off with some delicious cream cheese frosting. Here's the recipe:


Cream Cheese Frosting
Makes enough frosting for 1 dozen cupcakes

3 oz cream cheese
1/4 cup butter
1 tsp vanilla
2 cups powdered sugar

1. Cream the butter and cream cheese together
2. Add the remaining ingredients and beat for 10 minutes. No joke. Beat it for the full ten. That's how it gets so smooth and fluffy. :)


Wednesday, October 20, 2010

Homemade Pasta Sauce

Now that I have a post about quick pasta sauces, I find myself the possessor of a bucketful of tomatoes from my family's garden. I went home for fall break and my mom said, "Please take some tomatoes back with you. We have way more than I know what to do with. You can make some of that fresh pasta sauce for your roommates." Thanks mom, I will.

Making pasta sauce from scratch is a process, let me tell you. But it is SOOO worth it.

First you get lots of tomatoes.


Then you cut a little X on the bottoms of the tomatoes, plop them in some boiling water for about 30 seconds.....

And shock them in an ice bath!

Peel them, cut them in half and squeeze out the seeds, then throw them in a blender and whiz for a second. Then throw some fine diced mirepoix (carrots, onions, celery) in a saucepan with a few tablespoons of olive oil and cook until tender. Blend the mirepoix, and combine in the pan with the tomatoes and about a cup of your blanching water (the water you used to boil the tomatoes), and simmer the snot out of it. Seriously, you simmer it forever. My sauce sat on the stove for three and a half hours. Salt and pepper it to taste and voila! You have achieved sauciness!


Jana Banana Fee Fi Fo Fanna....

...That's what my Uncle Dean calls me. Anyway. Bananas. We have about a zillion (okay, seven) of them in our freezer at my apartment. For some reason a couple months ago people felt inclined to give me their old, browning bananas. They were all, "Hey before you go, take these bananas! They're too soft for me to eat, but I'm sure you can make banana bread out of them or something right?" Well yes, indeed I can. So today I rescued our freezer from hostile takeover by brown bananas and made some banana-blueberry bread. :)

Banana Blueberry Bread

1 cup butter, softened
2 cups sugar
2 tsp vanilla
1 tsp lemon juice
4 eggs
2 cups mashed banana
1 tsp salt
3 1/2 cups flour
2 tsp baking soda
2 tsp baking powder
1 cup sour cream
About 2 cups blueberries *SEE NOTE

1. Cream the butter and sugar together. Add the rest of the ingredients in the order given.
2. Bake at 350 for 55 minutes. Makes two loaves.

*NOTE* Unless you want blue bread it is pertinent that you gently fold in your blueberries at the very end. Also, I find that using frozen blueberries lessens the color bleeding, and makes them a lot easier to fold in without accidentally mashing them.


Tuesday, October 19, 2010

Cold Weather Food

Anyone who knows me knows that I am a desert girl through and through. I love the heat and I absolutely cannot stand humidity. Hot and dry, that's how I roll. So when the change of seasons rolls around I lament the onset of cold weather. Despite my dislike of the cold, I do love cold weather foods! I'm starting to bust out my arsenal of soups. Here's what I made for dinner tonight...

Orange Carrot Ginger Soup

8-10 large carrots, medium dice
1/2 onion, medium dice
1 1/2 quarts orange juice (no pulp is preferable)
2 TBS fresh grated ginger (may substitute 2 tsp dry ground)
Salt and pepper to taste
Olive oil

1. In a large pot, heat a few tablespoons of olive oil over medium high heat. Add the carrots and onions and cook until carrots are slightly tender, stirring occasionally, about 15 minutes.
2. Add orange juice, and boil until carrots are soft.
3. Puree in a blender or food processor.
4. Add ginger, salt, and pepper, and return to stove to keep warm until service

*NOTE*
If you are using fresh ginger, it is important to add it as the last step in your cooking process. Ginger has a tendency to turn bitter as it cooks.

Enjoy everyone! Happy fall cooking!

Sunday, October 10, 2010

The Purpose of this Blog

I was discussing blogging with some friends of mine recently. One friend was interested to find out that I do indeed have a blog. She wanted to know more about it. I was about to tell her about my blog until another friend of mine interjected and said, "Oh, it's just about food."

JUST about food? JUST about food?! I was a little bit peeved by that statement. I asked him, "Well, what else would I blog about?" He replied with, "Ummmm....your life?" First of all, food is my life. Second of all, I don't blog just to record what I do. This isn't meant to be some digital archive of my life. Besides, I feel like there are plenty of whiny college students out there that blog about their lives (not to knock anyone else's blog. There are many that I very much enjoy reading). But I want to accomplish something with this blog. So I feel like maybe I should share with you my purpose in blogging.

I was raised in a family where food was more than just something you put in your body so you wouldn't keel over and die. My parents are incredibly passionate about health, so I was taught from a very young age to be conscious of the food I put in my body. Not just any old food would keep me operating at an optimum level. Even when I was a baby, I didn't eat baby food out of a jar. Oh no. My mom would take the time to cook food until it was soft, and she would puree it for me. Even from the beginning of my life I was eating real food. Also, my family has kept a rather large garden every summer since the time I was six years old. I worked a lot of long hours in that garden during my growing up years, and was so lucky to reap the benefits around harvest time. I've had the privilege of enjoying fresh fruits and vegetables as the majority of my diet.

Those factors have influenced my philosophy about food greatly. However, I think the largest contributor to my appreciation for food has got to be my mother. First of all, she is a wonderful cook. But more important than that is the fact that she never let me be picky. If I didn't want to try something that was on my plate, that was just too bad. If I left the table without finishing something, it would end up on my plate at the next meal. Also, because of my mother's abilities, I was able to experience a wide variety of flavors during my young life, which did a lot in refining my palate.

This is going to sound totally cliche, but I have a lot of fond memories of sitting down to eat a home cooked meal with my family. In fact, if I think about some of my best childhood memories, most of them involve people gathering together to eat. Think about it. Thanksgiving dinner, Christmas dinner, Easter dinner, birthday dinners, lunch dates with your mom, dinner and a movie with your girlfriends...food!

I guess what I'm trying to say is food brings people together in a way that not many things can. And sure, I guess people can be brought together by a box of pizza. But to me, that's not all that special. As much as I enjoy the creativity and the skill it takes to execute a meal with flair and culinary perfection, where I find the most satisfaction is in the happiness I can bring to others with the food I make. Few things are as precious to me as the way a person's eyes will close as they savor a bite of something I've made. Then they smile, open their eyes, and with a twinkle in them, say to me, "Jana. This is amazing." When I spend six hours making you a birthday cake, what I'm really trying to say to you is, "Hey! I think you are so awesome that I didn't just want to buy you any old generic birthday cake. I wanted to put my heart and soul into it and make it something special. Because to me, you are worth those six hours and so much more. You are worth my time and effort."

To me, food is an expression of everything good in life- energy, passion, creativity, and love. I want to share those ideals with as many people as I can. If I can do that by posting recipes, and helping people feel the joy that I feel when I make something delicious and share it with others, why wouldn't I do that?

I want people to be able to have the same kinds of experiences with food that I was so blessed to have in my childhood. But so few people know how to cook. How are they supposed to find that joy that I found when each member of their family shuffles off to their corner of the house with a piece of frozen lasagna that says, "Our family isn't important enough for me to make time for family dinner." That's bogus. Other people say, "I just don't know how to cook." Also bogus. Learn. That's what I'm trying to do. I'm trying to teach people a skill that was central in making my childhood great. Something that has shaped who I am today. That's why I blog about food. Because food is about so much more than sustenance. It's about joy.


Saturday, October 9, 2010

Molto bene!

As a culinary fanatic the question I get the most is "What is your favorite thing to cook?" I hate that question. I seriously cannot answer it. The sheer joy I find in cooking cannot, CANNOT be delegated to one item alone. So I usually tell people, "I can't pick a favorite. Wanna know my specialty though? It's Italian."

I have been so fortunate to have interned and worked in an Italian restaurant in Albuquerque. It's called Vivace (if you ever visit Albuquerque, check it out! It's great. Tell them Jana sent you). Because of my three years of experience there, I have grown to love Italian food and Italian food philosophy so much more. And I feel like I'm quite proficient in the cuisine as well!

Anyway, the point of this post. My lovely stake relief society sisters started up a monthly cooking class and I signed up to teach today's class. I love opportunities to share my passion with others. Especially because I feel like cooking is a dying art. So few families sit down to a home cooked meal anymore, and many people lack the skills in a kitchen that I always assumed were common knowledge. I feel so blessed to have grown up in a home with a mother who is a fabulous cook, and one who taught me a love of good food as a child. Anyway, I wanted to find something simple, delicious, and quick to teach these sisters. As college students, we don't have time to spend all day making dinner (unless you are me, in which case I MAKE time). So I decided to teach them a few simple pasta sauces, and one really simple pasta dish.

Alfredo Sauce
1 pint heavy cream
1/2 cup (1 stick) unsalted butter
1 cup freshly grated Parmesan
Black pepper
Chopped fresh flat leaf parsley

Heat heavy cream over medium-low heat. Add butter and whisk gently to melt. Sprinkle in cheese and stir to incorporate. Season with pepper. Toss gently with hot pasta. Garnish with fresh parsley.
*NOTE* If you would like a lower fat version of this recipe, here are some ideas. Instead of using heavy cream, you can use milk. However, you will have to find a way to thicken your sauce. You can accomplish this by mixing equal parts butter and flour in your saucepan before you add milk. Cook the butter and flour mixture (called a roux) for about 2 minutes so the flour taste cooks out. Add your milk and whisk the snot out of it. Then proceed with the recipe as above.

Quick Marinara Sauce
Most old world Italian sauce recipes that you find require at least a day to produce. The sauces require such long hours of simmering --that's why they have such phenomenal flavor! This recipe (courtesy of Cook's Illustrated) is the best way to get the flavor of hours of cooking in 30 minutes or less!

2 TBS unsalted butter *See note
1/2 an onion, grated *See note again!
1/4 tsp dried oregano
1/2 tsp salt
2 medium garlic cloves, minced
1 (28 oz) can crushed tomatoes
1/4 tsp sugar *see note once again! Sorry, I like notes!
2 TBS coarsely chopped basil leaves
1 TBS extra virgin olive oil

Heat butter in a saucepan over medium heat until melted. Add onion, oregano, and salt; cook, stirring occasionally, until liquid is evaporated and onion is golden brown, about 5 minutes. Add garlic and cook until fragrant, about 30 seconds. Stir in tomatoes and sugar; increase heat to high and bring to a simmer. Lower heat to medium low and simmer until thickened slightly, about 10 minutes. Off heat, stir in basil and oil; season with salt and pepper. Serve over hot pasta.

*NOTES, Notes, Notes!* If you would rather substitute olive oil for butter, feel free. The reason this recipe calls for butter is because butter naturally caramelizes as it cooks which deepens the flavor of the sauce. For this reason, the recipe also calls for grated onion. When onions are grated, the surface area is increased, so they caramelize faster. I prefer to just finely mince my onions (I have terrible luck with box graters. I always end up with grated knuckles). About the sugar. Don't add it if you don't wanna! If you like your sauce with a little more sweetness, the sugar is there. If you like it more savory, leave it out.


Pesto alla Genovese
"Alla" means in the style of. This pesto hails from the region of Italy known as Genoa (hence pesto alla Genovese!) The olden day Italians came up with this sauce as a way to ensure that they could have the fresh flavor of basil year round.

2 cloves garlic, peeled
1/3 cup parmesan cheese
1/2 cup spinach
2 cups basil leaves, loosely packed
1/2 cup toasted pine nuts
Juice from 1/2 a lemon
Olive oil
Salt and pepper to taste

Add garlic, parmesan cheese and pine nuts to a food processor or blender and pulse until a paste forms. Add spinach and basil, pulse to combine. Add lemon juice. With the machine running, add a stream of oil until desired consistency is achieved. Add salt and pepper to taste. Toss with cooked pasta!

*NOTE* Please, use this recipe as a guideline. If you like more garlic, add more garlic. If you don't like cheese, don't use any. Play around with it. Don't be constrained by my recipe. Also, feel free to make substitutions! Try adding walnuts instead of pine nuts. Maybe make a pesto out of cilantro and parsley instead of basil and spinach. Make it your own creation. Experimenting is the best way to learn what flavors blend well together.


Special thanks to my roommates Melissa and Bekah who were my photographers and plated my pastas! You ladies rock!


The Burque Bunch

I am a proud native of the fabulous city of Albuquerque, New Mexico. I love everything about that place. The climate, the sunsets, the topography, the things you can do, places you can go....but I think what I miss the most about Albuquerque when I'm up at school is the people! Fortunately for me, this year a lot more people that I know from back home are up here in Utah. That and I've decided to be more proactive about organizing activities between friends. So a few weeks ago I decided to get a group of Albuquerqueans together for an impromptu dinner! Considering I invited people the afternoon before, it was a great turnout. Because I didn't want to spend a fortune on this dinner I assigned a few people to bring some food. I provided the entree, a side, and dessert. One friend brought drinks (actually he brought the ingredients. I made the drinks), another brought rolls, someone brought salad, and one brought mashed potatoes. For my contribution I made three lovely maple glazed pork tenderloins, some oven roasted asparagus, iced chai, and a delicious caramel apple cake.
Dinner was fabulous! I was so glad to share good food with such good company. I missed my friends from back home. I didn't realized how much I missed them until I actually started spending time with them again. Thank goodness I have started spending more time with them. I feel less homesick now that I have little bits of Albuquerque conveniently located in Orem and Provo. :)

Pork tenderloin and roasted asparagus

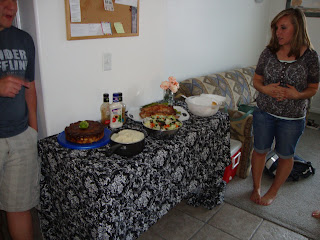
Our table scape plus Taylor and 90% of Bryce


Caramel Apple cake with green apple rose

Want some recipes? Okay, here you go! :)

Caramel Apple Cake

For the cake:

1 1/2 cups flour
1/2 tsp salt
2 tsp baking powder
1/2 cup butter, softened
1 cup sugar
2 eggs
1 tsp vanilla
3/4 cup milk

1. Add the flour, salt, and baking powder to one bowl and stir to combine.
2. In a separate bowl, whisk eggs with vanilla and milk.
3. In a third bowl or in a stand mixer, cream the butter and sugar together until smooth.
4. Beginning with the milk mixture, alternate adding the milk and the flour mixtures to the creamed butter and sugar. Do this in three additions, making sure to scrape the bowl between additions.

For the Caramel
4 TBS unsalted butter
3 cups sugar
5 TBS light corn syrup
1 cup heavy cream

1. Cook the sugar and corn syrup in a saucepan over medium-high heat, stirring occasionally until the sugar is dissolved and the mixture is dark amber, 7-10 minutes.
2. Reduce heat to medium. Carefully add cream and butter (it will splatter -- don't freak out!), stirring until combined, about 3 minutes.

Assembly

1. Peel and core 2 granny smith apples
2. Slice the apples into rings, and press into the bottom of a greased 9 inch cake pan, overlapping slightly.
3. Pour half the caramel mixture over the apples.
4. Pour half the cake batter over the caramel.
5. Drizzle the remaining caramel over the cake batter and swirl through with a butter knife.
6. Pour the rest of the cake batter on top.
7. Bake at 350 for 50 minutes to an hour or until an inserted toothpick comes out clean

TO UNMOLD THE CAKE - after the cake has cooled (to allow it to set further), run a clean knife along the edge of the pan. Warm up the bottom of the pan (you can do this on your stove or dip the bottom of your pan in hot water) to soften the caramel. Place a plate on top of the pan and flip over so the cake unmolds onto the plate. Voila! Beautiful caramel apple cake. :)

*NOTE* When I made this cake I doubled the cake batter recipe and had a little too much. However, 1 recipe is not enough, so I would recommend making 1 1/2 the recipe.


Maple Glaze -This is great for pork, chicken, or duck!

*NOTE* I did not include measurements in this recipe simply because I feel it unnecessary. I feel that experimentation in the kitchen is very important and you should make this glaze to suit your tastes. Use this recipe as a guideline and an inspiration -- not as a absolute directive.

Maple syrup
Ginger
Dry mustard (don't use a lot!)
Cayenne pepper (a little goes a long way!)
Nutmeg
Cinnamon
Cornstarch
Water

1. Bring maple syrup, ginger, dry mustard, cayenne pepper, cinnamon, and nutmeg to a boil in a small saucepan, stirring occasionally.
2. After the mixture has reduced slightly, make a slurry (Add about 1/2 tablespoon of cornstarch to 1 1/2 tablespoons of water and mix) and pour into the sauce, stirring.
3. Allow sauce to return to a boil and let thicken to desired consistency.
4. Serve with pork, chicken, or duck!

Wednesday, September 1, 2010

Garde Manger

Up until classes start (as well as into the first week, I suppose) THE question is, "Hey what classes are you taking?" My answer? Garde Manger. To which most people respond, "What in the heck is Garde Manger?" Literally translated, Garde Manger means "keeping food fit to eat". Way back when royalty and wealthy people started hiring people to cook for them, all the food that was left over from previous meals was given to the Garde Manger chef to figure out what to do with. So Garde Manger became traditionally associated with things like salads, sandwiches, crudites, hors d'ouvers, etc.

I've enjoyed my class a lot so far. Being that we are only a week into the block, we've worked mostly on salads, salad dressings, sandwiches, fruit platters, and crudites (vegetable platters). But just look at all of the pretty stuff we've created!

"Kolleen's" crudite platter
My sandwich! It has turkey, lettuce, tomato, swiss cheese, paprika and cilantro mayonnaise, avocado, bacon, and a fried egg on grilled wheat bread. It was super delicious...sadly I didn't think about taking a picture until after I had taken a huge bite. So it's less aesthetically pleasing now. :(

Kolleen and Shelby....totally cheese-ballin it

My orange peel rose

Monday, August 2, 2010

Playing Catch-up

Would you like to know something interesting? I'm more busy during the summer than I am at school. Somehow that seems a little backwards to me. This summer I am working two jobs, one at the fabulous restaurant I interned at as a senior in high school, the other as a nanny, which job I have also had since high school. I work roughly 80 hours a week. As a result of my busy work schedule I have been a blog neglecter. Shame on me, I know. Please allow me to redeem myself.

My Momma's Birthday

This year we decided to go cakeless. I wanted to do something a little more simplistic but equally as fun to make and just as delicious. My mom is a fruit fanatic(seriously, open our fridge. There are usually at least 10 different fruits in there), so I thought it might be fun to make some fruit tartlets...which also gave me an excuse to buy some little tart pans, something I have been dying to buy forever, but never had a reason to.


They turned out nicely, no? These tarts are extra special because guess what? They're dairy free! Usually the pastry cream in the center has whole milk and butter. However, my family does not drink milk. I have a lactose sensitivity and the rest of my family just thinks milk is disgusting...which it totally is. It's not even good for you besides! Everyone thinks that you have to drink milk and have other dairy products to get calcium. Um, so wrong. You're body can't even absorb most of the calcium in milk! So why is it advertised so much that we should drink milk? Because the government subsidizes dairy farms, thus they are better off if we Americans drink more milk. And another thing. Did you know, that we are the only species that drinks milk after infancy? On top of that, we are drinking milkfrom an entirely different species! And you wanna know what that milk is designed to do? Take a baby cow and turn it into a 1500 pound behemoth in a matter of 6 months. Wanna drink milk now? It's just fat and cholesterol people. You get more protein from almond or soy milk. Anyway, I digress. Back to my fruit tarts. They're dairy free. I made them with almond milk and soy butter...and they were freakin delicious!

Father's
Day

I always like to make man food on father's day. Some people may think it's weird that as a future chef of the female persuasion I will differentiate between man food and chick food. But I do. Guys don't generally appreciate the aesthetics of a dish as much as a woman. That doesn't mean I won't make the food look good on a plate. It just means I won't take the time to artfully lay down some sauce or construct a pedestal of rice or potatoes atop which to lay my grilled chicken or something. No. Man food doesn't require as much attention to detail. What it does require is a nice juicy steak. Which of course I had. This was Father's day dinner after all. What would it be without steak? Oh, and I paired it with grilled lobster tail, wilted swiss chard, and rosemary roasted potatoes. A little surf n turf for my dear old dad.
Although I'm not usually one to blab about my kitchen mishaps (I like to pretend I do everything perfectly!), I have to relate to you the excitement surrounding my steaks. I marinated my steaks in thyme oil...mistake. While the flavor was fantastic after pulling the steaks off the grill, I had about five minutes of grill time where I was sure I was going to burst into flames. Because my steaks had so much extra oil on them, the grill flared up...a lot. I literally had 8 inch flames coming off my grill! I was about to panic, sure that my steaks would be completely incinerated. I was pretty ready to throw in the towel on my dinner, storm off and leave everyone hungry. But then an idea struck me. Fire needs oxygen to thrive. So I slammed the lid on my grill and luckily my bonfire burnt out in about a minute, leaving my steaks safe. From this experience I learned to NEVER marinate in oil if you will be grilling. Which when I think about it really should have been something I knew not to do. Anyway.

Amazingly, we managed to have every course be something from off the grill. Our salad was grilled. We even had our dessert grilled! The grilled dessert idea I can't credit to myself, however. When I was working at Vivace the Saturday before Father's Day, I was telling my boss, Joey, about my menu plan for fathers day. Suddenly I realized (out loud), "Crap! I don't have a dessert planned!" Joey looks and me and says, "Well, if you're already firing up the grill, why don't you do dessert on the grill too?" Um, hello! YES! He is such a genius sometimes. I mean, how perfect is it to do each course for a Father's day dinner on the grill? So as per Joey's recommendation I did grilled peaches and plums that I had cut in half and rolled the cut side in cinnamon and sugar.They turned out so beautifully! I served them with a dollop of mascarpone whipped cream and some toasted almonds. This dessert was so perfect for summer and it had everything you could ask for from a dessert. It was sweet but tart, warm from the peaches and plums, cool from the cream, the fruit was soft, the cream was smooth, the almonds were crunchy.....heaven. :)

Last Minute Dinner Plans

Sometime mid June my friend Jake got back from his mission in Chicago. One Monday morning, a few weeks after he came home my mother announces to me, "Hey, I'm inviting Jake over for dinner. So make something special okay?" Um, thanks Mom. I'm glad you gave me so much notice. I was also annoyed because the last time I had interacted with Jake very much at all was during high school...at which point he drove me absolutely crazy. So here I was, 8 hours out from a dinner that was supposed to be wildly impressive, with a guy that I practically couldn't stand, and I had no idea what I was going to do. Luckily I came up with something.

I grilled chicken, sliced it and laid supremes of fresh orange and grapefruit between the slices, served it with rice and a salad of mixed greens and a spring onion flower wrapped in a cucumber slice so it would stand and topped it off with a citrus Dijon dressing. How's that for 8 hours notice? Boo-yah! Oh, and the dinner went great by the way. Jake is now one of my best friends. Funny how that works out. I always say, food brings people together!

Saturday, April 10, 2010

Mmmm. BACON! And Cheesecake too!

Is there anything better in the world than bacon? Well, yes there probably is. However, bacon is something pretty tasty. :) I've recently been into wrapping things in bacon. This is the most recent dish I've done:

Bacon wrapped chicken drumsticks with sweet and spicy pineapple dipping sauce. DE-lish!

Also, I recently revamped a cheesecake recipe that I rather love. My baking and pastry textbook from earlier this semester has the most incredible cheesecake recipe in it. I was thinking the other day about some substition suggestions I had seen for desserts to make them less bad for you. I read somewhere that if you substitue ricotta cheese for half the amount of cream cheese in cheesecake, it cuts the calories in half. Sounds pretty great to me! So I tried it.


I just love my adorable mini springform pans! They make the perfect portion size. One quarter of a cheesecake is just enough that your sweet tooth is satisfied, but you don't overindulge. Anyway, with my cheesecakes oven ready I started to guess at what the finished product would be. I was a little worried that the cheesecake wouldn't be quite as smooth due to the ricotta substitution. Also, I used half and half in my recipe instead of cream, so my batter was a little more runny than usual. After coming out of the oven, I let my cheesecakes cool for 2 hours before topping them with a blackberry/blueberry coulis. Then I let them chill overnight and Voila!


I am glad to say these turned out just as smooth and creamy as any cheesecake I have ever had. Plus they have half the calories. Which, as my adorable roommate stipulated means we can eat twice as much! Everyone wins. :)

Total Pageviews